Why does 2020 seem so long ago? Two years ago I was busy sanitizing groceries, making sourdough, homeschooling my child, etc. I always told myself that it was temporary, a couple weeks. I would get to sew “tomorrow” and tomorrow never came. The hobby that I enjoyed so much started to feel like another chore. It didn’t matter if I sewed something for myself, I was living in sweatpants. My sewing was consumed with masks, repairing masks, and the occasional make for my growing child. I was mentally exhausted. I didn’t realize that I was in ‘Groundhog Day’. Fast forward almost two years to the day and I decided that I was sick of feeling this way, I needed to think of something that would make me feel like myself, not something that I was sewing for someone else, just something for myself, that was NOT a mask.
From there I moved on to a few new sports bras. I like the FREE Hyacinth Pattern from OhhhLulu. I used Tricot and Powernet and I added a band. Do you know what started to happen? Putting on something that was new, basic but new, gave me that quick boost of confidence that I forgot that I missed. It felt sooo good to wear something that wasn’t just that same pair of sweatpants. To be fair, I was alternating between two pairs of sweats.
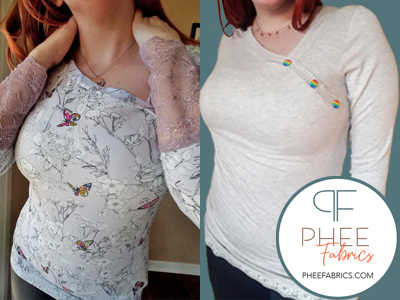
Alas, the joyous spark was ignited. Then I started to think about what I could make that wasn’t so “casual”. At the same time Chalk & Notch released the Wren. I like that it is drafted for different cup sizes and has a shirt and dress within the same pattern. I used Rayon. One technique that I always use is French Seams . I love the finish of them. Yes, it takes longer but I do sew for longevity and it is worth it.
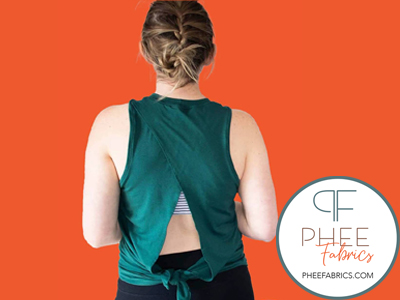
This gorgeous top from True Bias. It’s called the Roscoe Blouse and includes a dress in the pattern also made by Jasmine Macias, made in Rayon
I hope this blog inspires some of you to also reignite the creativity. I didn’t realize how much was missing til I started it again. What is something on your list to make?
During the month of March we focused on free patterns. We find that free patterns can be a blessing and a curse. It gives you the ability to try out the drafting and instructions of a specific designer. Overall, these patterns have had positive feedback. We look forward to adding more to this blog in the future.
“This was my first make from Hey June, the instructions were clear but the armholes were too large so I had to modify them. I’m excited to try a paid pattern from them.”
“I loved the 40K sway, the instructions were super straightforward and it even included hip and bust grading mark points which I thought was really great especially for a free pattern. It came together in less than an hour and looked great”
“The pattern is pretty awesome and turned out super cute. I’ve had the pattern for like 3 years and has been on the top of my list but this is when I finally made it”
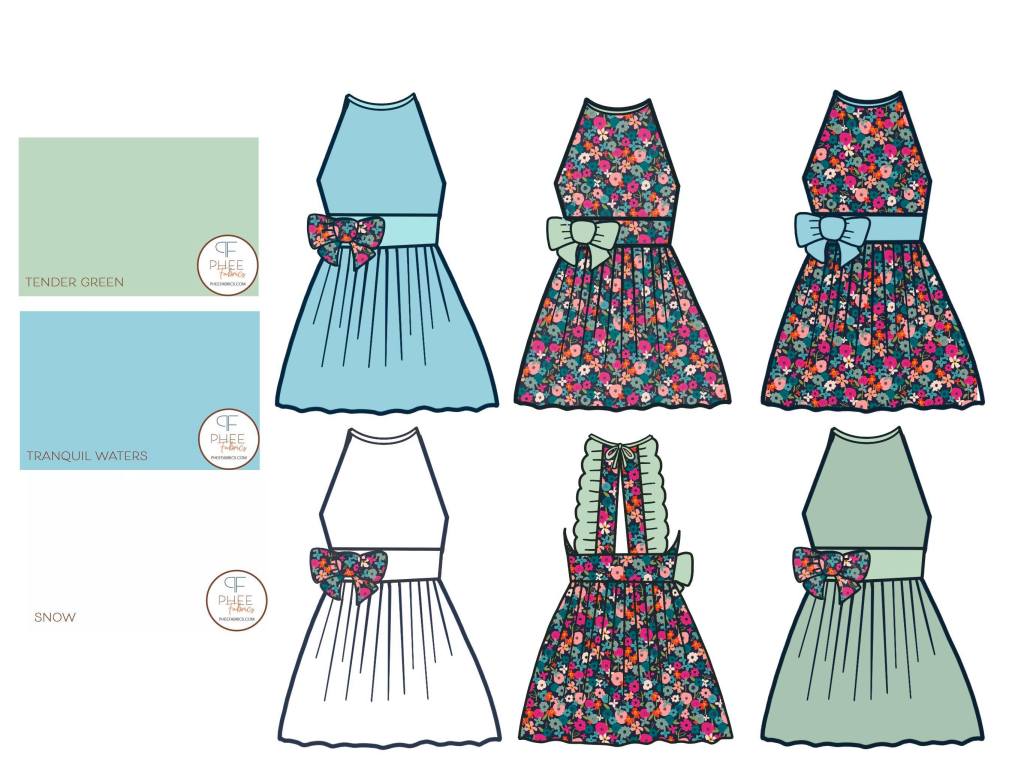
“I’m all about the puff sleeves, and with a half circle skirt, it gives twirl while also not using up so much fabric like a full circle skirt. I can see myself using it again!”
Phee Fabrics is now stocking Art Gallery Rayon. During the month of April we worked up some of the patterns listed below to show the versatility and drape of this gorgeous rayon. The reasons we love this base is:
– Rayon is abrasion resistant
– Rayon is made from natural fibers, like bamboo and beech trees and the process makes it a semi- synthetic fabric
– Rayon has a “fluid drape”, meaning that it hangs and moves in a flowy way, similar to a liquid
– Rayon is more absorbent than cotton and is cool and breathable
In February of this year, I found myself in a deep dark place both mentally and emotionally. Things started getting a little better for me in March, but come late March after the pandemic began, I slowly began spiraling down that rabbit hole of lost hope again. Working from home, I felt like a prisoner in my own home, and my once safe place (safe place away from work) was no longer safe. Whenever I looked at my den, that once made me oh so happy; I just wanted to cry.
By early May, I had gotten really bad, I was always crying, and I couldn’t focus on a single task. I felt like I was drowning, and I would never see the sky again. I knew it was time to find help, so on May 7th, I got in my car and drove to the Psychiatric Urgent Care clinic. The previous day I had spent calling around trying to find a therapist, without anyone calling me back that day, and I knew I couldn’t wait any longer. I’m not sure if all cities have a psych urgent care center, but I feel so blessed that I was able to get help the same day I needed it.
Mental health is critical, and I know it can be tough to talk about. I hope that by sharing my story, I can help you to be stronger to seek help when you need it. I have struggled with depression for over 20 years, it’s part of who I am, and I know when I need to seek out help.
In the past, sewing has always helped in times like this, but I was having trouble even doing that. I needed something that was mindless sewing, something more meditative; this is where sewing a quilt top came to be. I’m not a quilter, I’ve always said this, but I am a fabric collector. All the Art Gallery Fabrics Bundles that I had been purchasing from Phee Fabrics were a mini fabric collection on their own. I loved looking at them all but didn’t know what to do with them, then I saw this quilt on Instagram and fell in love. Taking time to choose each fabric, then putting them together to make a single quilt block brings me so much joy. And then how full of joy I feel when I get my quilt back from my quilter is even greater. Yes, I said my quilter, that means I love making quilts now!
Quilted by Kristen Lee.
Fabric
I started with some of the AGF Bundles from Phee Fabrics, and ordered an additional bundle, then got my backing and binding fabric. Below is all of the fabric I used:
Five of the ten fabrics as the background – I did cut the darker fabrics, and when laying out the blocks, I didn’t like how much of a contrast there was between the light and dark of the background, so I pulled them out.
This stuff is super black; it’s so amazing! I used it for the majority of my binding with one strip of an accent fabric from one of my bundles around one corner.
While working with my quilt blocks, this fabric kept made me smile every time I saw it. The fabric was in the Written bundle, but I wanted yardage of it to use for my quilt backing. I instantly contacted Phee and asked if the fabric was available for them to order. It didn’t take too long for the owner Melissa to get back to me and let me know that it was, and it could go on pre-order. When you need enough fabric for a queen size quilt back, you know the pre-order will go through because that was at least 8 ½ yards of fabric. I went with extra fabric to make a couple of pillowcases to match, which I need to get on top of.
Pattern
The pattern I used was Starshine by Modernly Morgan. If you want to make your first quilt, then I highly suggest using one of her designs, as they are straightforward and easy to understand.
What I Learned
Double-check your measurements before cutting. They always say cut once, measure twice, but they don’t tell you to double-check your measurements on the pattern before cutting. I continuously measured twice before cutting my background fabrics (the white and blacks) as I had a minimal amount of extra fabric for the size I was making. Well, instead of cutting 5 ½” x 3” rectangles, I cut 5 ½” x 5 ½” squares. I cut down the squares and then pieced the fabrics that blended well together, although I wasn’t able to piece some of them.
There are no rules in quilting. Okay, maybe one rule, use a consistent ¼” seam allowance, but other than that, you can do whatever you want. Other than that, you can do whatever. So if you don’t want to follow the pattern for the fabric placements, you don’t have to. I wanted to spread my fabrics out more, so I did my own thing.
Art Gallery Fabrics fray the least amount from any other fabrics. Of all the fabric I’ve used in my life, I noticed that the handling of the AGF barely frayed at all! If you go back up to my “double-check your measurements” bullet above, I did run out of background fabric and pulled in some stuff from my stash that who knows how long it was sitting there. I wish I could have used all Art Gallery, but it wasn’t going to happen. Those other fabrics frayed so much while I was working with them, I couldn’t believe the difference.
Hand sewing a quilt label takes forever but looks so pretty. Check out this sweet hand embroidered quilt label that made. I used the same fabrics that were used the blocks. This thing took forever, but I love it, and I will continue to hand embroider labels for quilts.
Matching corners and seams take practice. I’ve noticed that with each block I make, the more precise my corners from half-square triangles (HST) and seams start to match up better and better. This doesn’t mean I don’t love my wonky crooked seams and cut off HST corners, because I see them in my quilt as a learning and healing process.
When using a mixture of low volume fabrics for the background, don’t overthink placement. I kept overthinking my placement for where my low volume fabrics were, yeah, I know not all are super low volume, as I went more for black and whites, yet I have a couple of navy and whites mixed in, but you get it. I kept thinking this is a “scrappy” quilt; it needs to look that way, then I finally said forget it and just started sewing. It took a lot of the stress out of the fabric placement of the background out. I then divided my lighter backgrounds among my blocks and then my heavier, as well as my mids so that they would be evenly distributed among the quilt. When working on each block, I just focused on how the block made me feel.
Choose fabrics you love or bring you joy. I had one fabric, I wasn’t super in love with, and when I went to match this fabric with others for one of my blocks. I then pulled this fabric from the piles of the different cuts and went on.
Sew and extra block if you have the fabric. I sewed an extra block just in case I wanted to make a matching pillow cover or aren’t happy with one of your blocks. I love all my blocks, but the extra block I didn’t add, I just couldn’t figure out where to put it in my quilt “puzzle” when I laid it out. I’m planning to make a matching throw pillow for my bed with it.
If you’re making a bed quilt, buy extra backing fabric to make pillowcases. I love the back of my quilt so much, and now I need to make pillowcases to match it, as well as pick one of the colors on my quilt to paint my bedroom walls.
Phee Fabrics is finding ways to use up your Art Gallery scraps. This blog is focusing on Car Seat Neck Pads! Plus you have a chance to win a Scrap Pack!
Over time the neck pads are on the car seat have become dingy plus they’re boring. So why not redo them? These only cushion the straps against the collarbone and do not reduce the safety of the car seat. These are the same size and thickness of the original ones.
When I saw the Sonia Estep Bahama Shorts made in AGF Cool Foliage Denim I knew I had to have them and quickly purchased the pattern. The pattern is either for shorts or pants and I figured shorts would be the best starting point for fitting and it’s 105 degrees out right now.
There is a lot of room for your own interpretation in this pattern so I’m hoping to clear some of it up and help alleviate some of the stress of sewing a pair of woven shorts.
These tips are useful for all woven patterns, including this one.
Pockets
If your pattern contains a piece for a square or rectangular piece, I find it easier to measure the pattern piece then cut the woven fabric on your cutting mat to ensure a straight cut.
Fold and press the seam allowance
Left: exposed cut pockets Right: enclosed pockets to eliminate fraying
Open up and snip the corners to reduce bulk
Snipped corners to reduce bulk
Fold the cut edge to meet the pressed line, press, fold again and press. This will ensure that you won’t have internally frayed pocket
The back flaps tend to use 2 layers of fabric so why not have so fun with it and use a scrap print for the inside .
Make sure the right sides are together, stitch around leaving a small pocket for flipping.
Snip corners then flip so the wrong sides are together and press.
Pocket Positioning
With the Bahama Shorts, this is where it gets tricky because depending on the waistband that you choose will decide on the rise. Just following the pattern could leave your pockets not positioned in the best place so I would suggest the you decide on the waist option before basting the pockets.
Baste the pattern together now.
Because you can use any elastic that you have, I chose 1.5″ because I had it on hand. After folding and pressing the casing, this would have left the waistband stitching into the front pockets.
I found that using 3/4″ elastic was the best option to create your desired rise. Once you get the ideal rise (do not add elastic yet) you can then add the pockets to the most flattering positions.
After that is done I always assemble wovens with French seams.
Also featuring a key fob. You can find the pattern HERE